Top tips for packing & flying with your bike
Flying with your bike isn’t always straight forward but the joy of riding your own bike in a different place often outweighs the negatives. This blog will help you navigate flying with your bike: from booking to packing and negotiating unexpected airport issues.

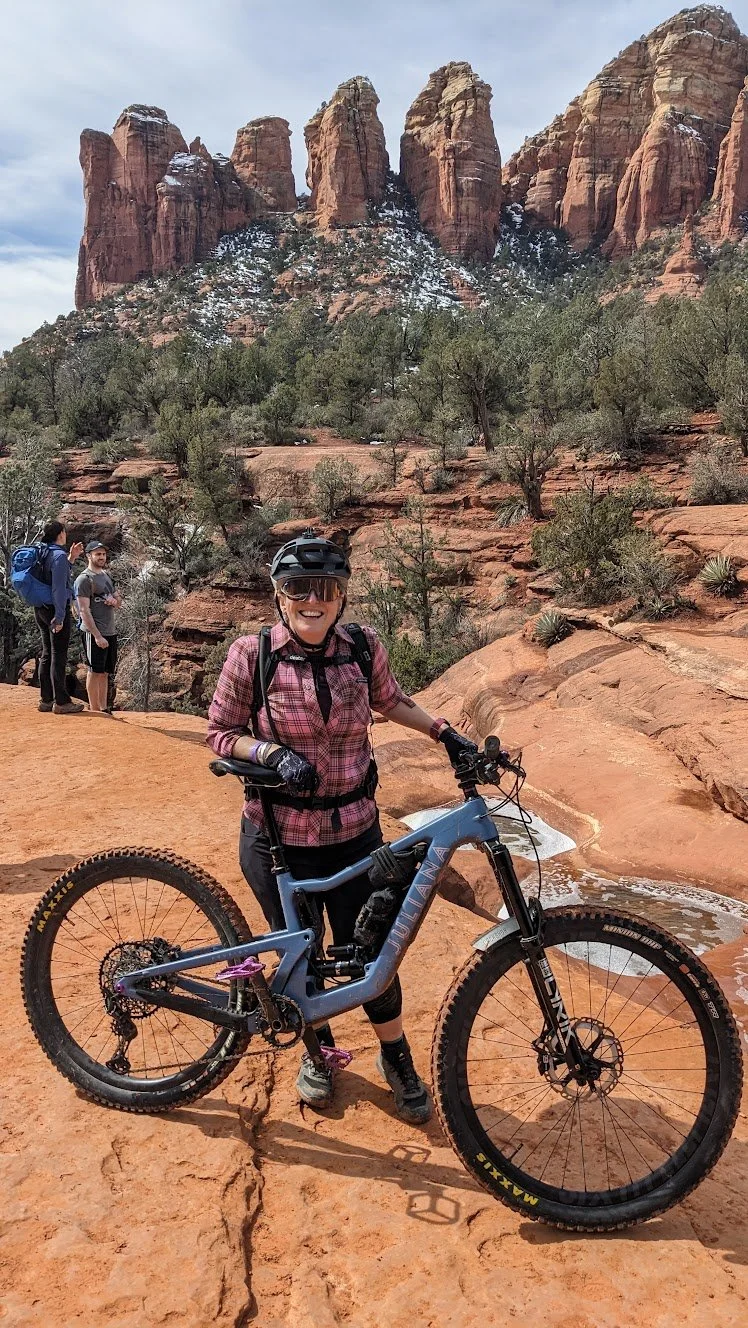
Reflections of Sedona
Airlines and ticketing
Check the airline’s policies on flying with bikes
o Do they allow you to check the bike in place of your hold luggage?
o Do you have to pay extra?
o What are the dimensions and weight allowance?
o Do you need to confirm the bike reservation closer to the time of flying?
Is your flight guaranteed to be with that airline or do they use a ‘code share’ system where you book on one airline but the flight is delivered by another?
o Code Shares do not guarantee the same rights as the airline you booked with

Bag size
Experience:
We booked with British Airways (BA) who recorded our bags on the booking as the max BA dimentions. The flight was delivered by American Airlines (AA) who had different bag dimensions and (without even measuring our bags) declared that our bags were oversize and we would need to pay £300 extra for the bikes.
Solution:
· Double check all policies for the airlines (original booking and code share airline)
· Know the exact size of your bags and carry a lightweight tape measure (none of the check in desks had one).
Weight
Experience:
A modern full-suspension MTB and bike bag comes in very close to the 23kg standard weight limit for hold luggage. Before we flew we weighed our bikes on 3 different sets of scales and each gave a different answer, so we removed our pedals from the bike bags and hoped for the best. When we arrived at the airport we had to open our bike bags and prove they held nothing more than the bikes themselves and they waived the extra charges (we were 1kg and 4kg over for the two bags), but it was stressful.
Solution:
· Carry nothing other than the bike in the bag
· Be prepared for them to question the weight and contents and show that you are not trying to get away with extra luggage allowance.

View out over Sedona from Hiline Trail
How to pack your bike for flying
1. Before you begin to pack your bike do an M-check and carry out any maintenance so that when you arrive you’re ready to roll. Important things to check are:
a. Tyre sealant if you run tubeless tyres. Deflating the tyres for flying runs the risk of the tyre losing its seal on the rim. Having fresh sealant in the tyre will help it to hold air when you reinflate the tyre.
b. Brake bleed. The jiggling of loading, flying and unloading bike bags is great for dislodging air bubbles in a hydraulic system. Bleeding before you go will help reduce the chances of this.
c. Brake pads. Check how much wear there is left on your pads. If in doubt pop fresh pads in and keep the old ones as spares.
d. Chain wear. Riding in places like Sedona, Arizona involves lots of short, punchy technical climbing. A worn chain and/or cassette will slip like mad in these conditions so check both before you fly. Regularly changing your chain at 50% worn will keep your cassette from wearing prematurely.
e. Chain lube. Clean and re-lube your chain.
f. Gear cable(s). When gear cables begin to fray, they lose their ability to hold tension making your shifting sloppy. Check condition of the cable and change it before you go.
g. Gear limit screws. Over-shifting on the largest cog on the cassette can mean the loss of the entire back end of the bike when the chain slips between the cassette and spokes bringing the bike to an abrupt holt. So check your lower limit screw in particular.
2. Spares to take with you. Assuming you’re going to a developed area with local bike shops, these are the two main things you need to take.
a. Brake pads. Specific to your brake and rotor combination, these can be hard to get hold of easily. Different riding conditions can cause pads to wear more quickly than on your home trails, so carry spares with you.
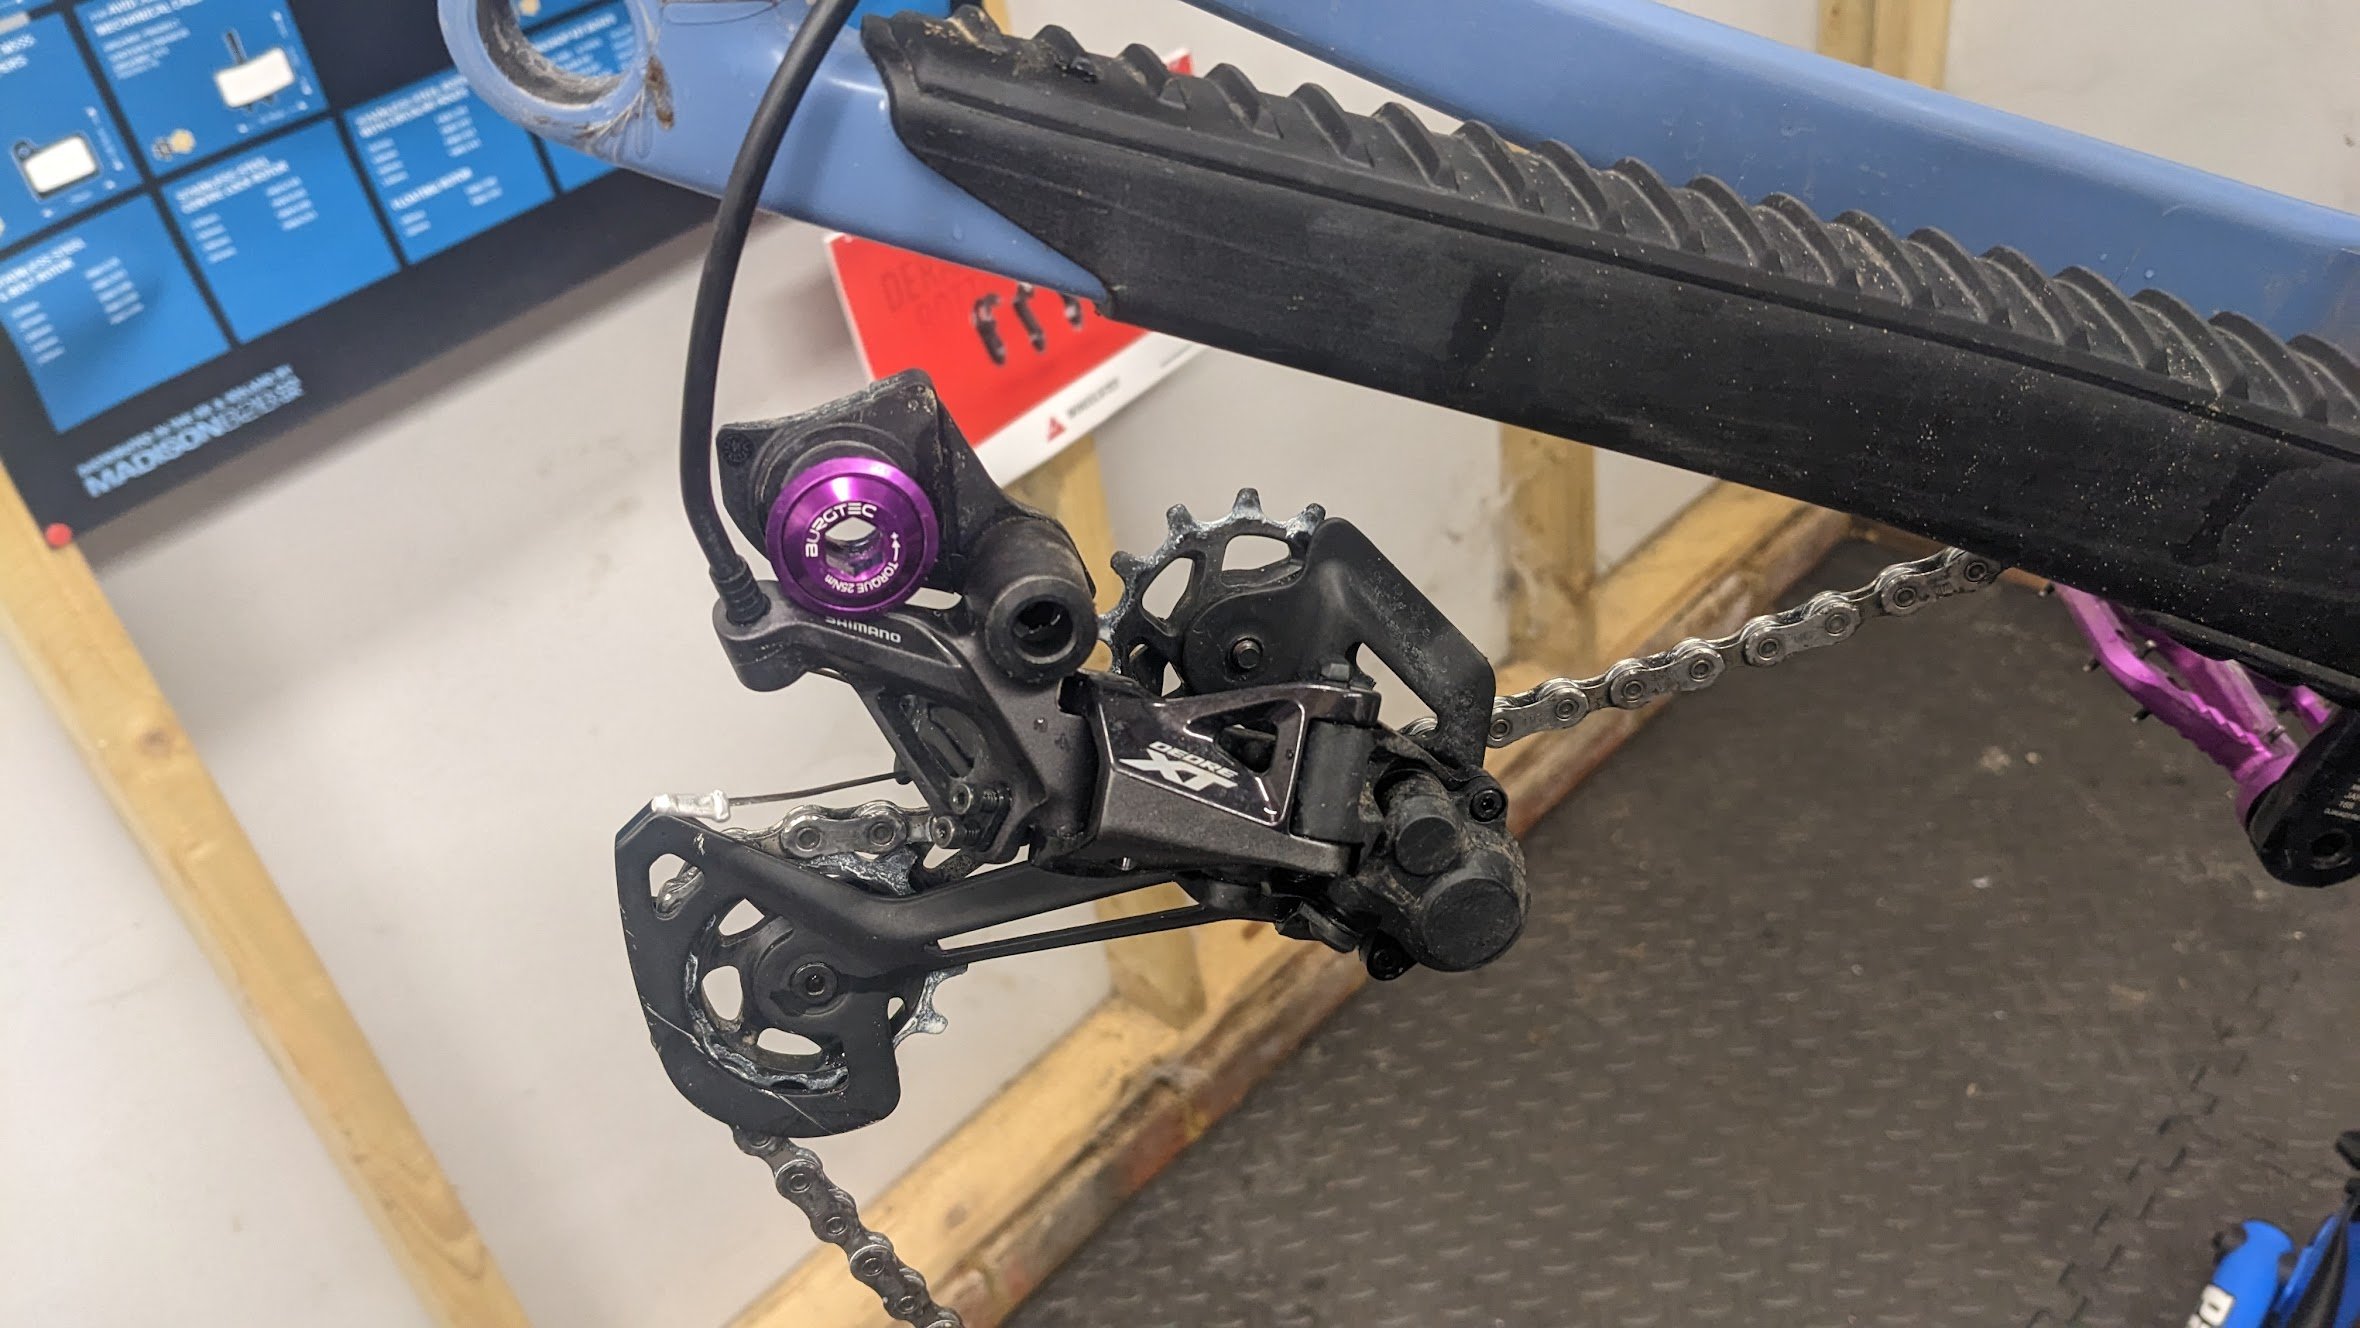
b. Derailleur hanger. Often specific to the make, model and even year of your bike, these are essential to carry as a spare. Even if you don’t know how to fit it yourself, you can always take it to a bike shop and them to fit. Supply issues can mean hangers are not easy to get hold of quickly.
3. Packing process. Each bike bag is different but these tips will cover you on most bag options:
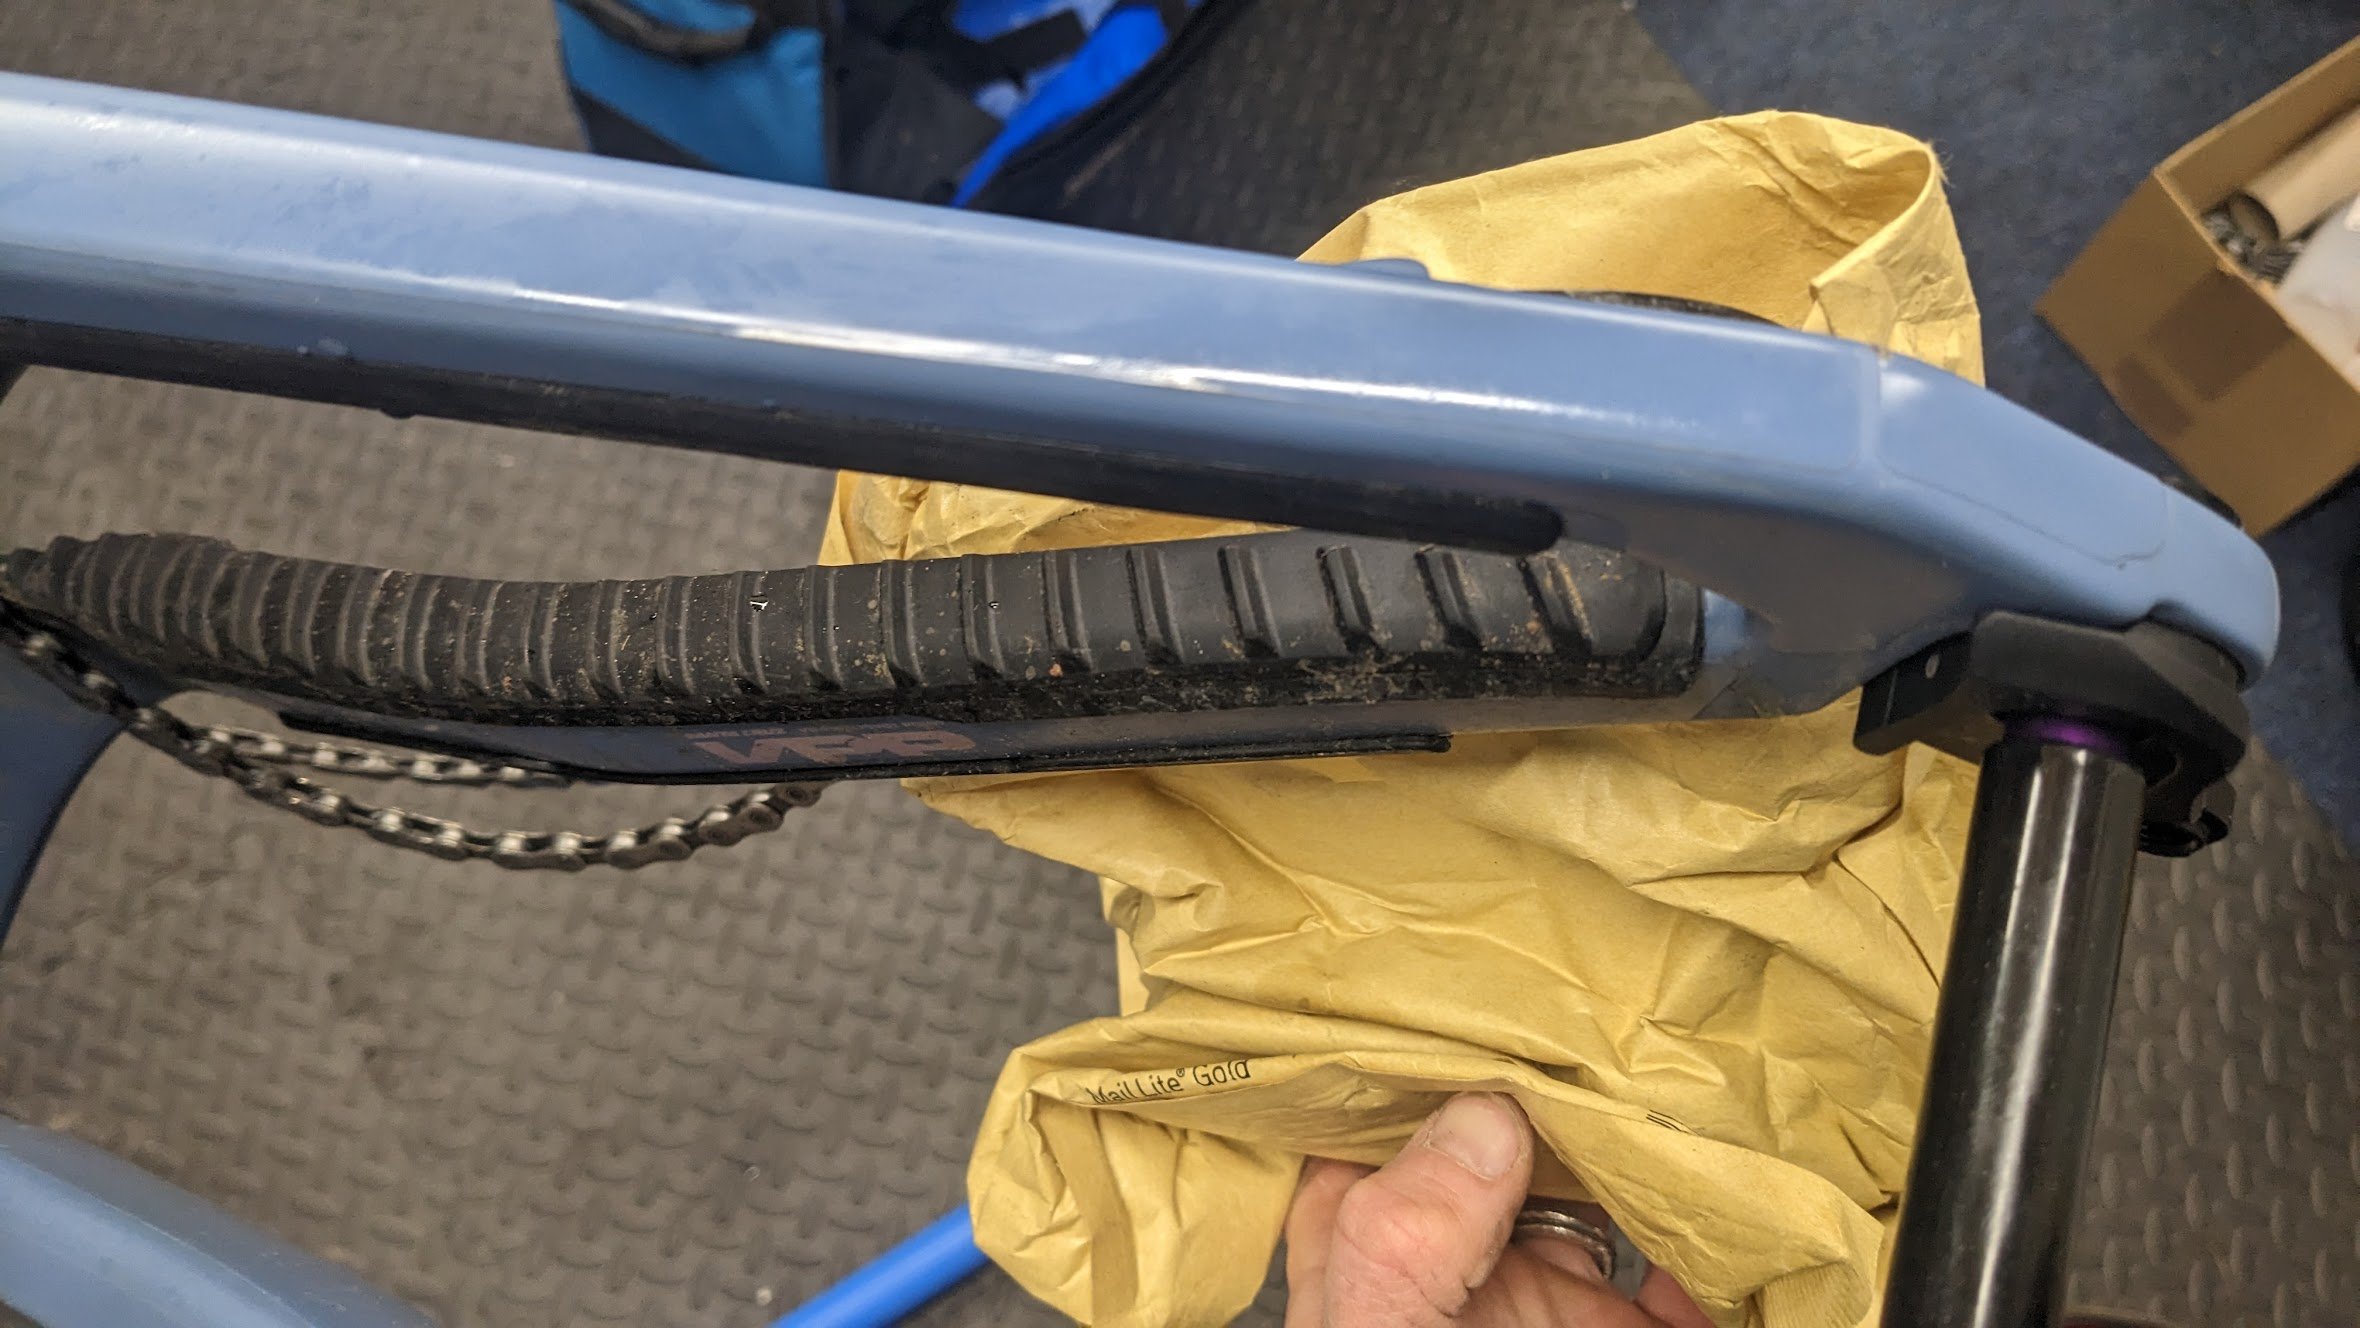
a. Mark the angle/position of your handlebars at the stem and then remove them
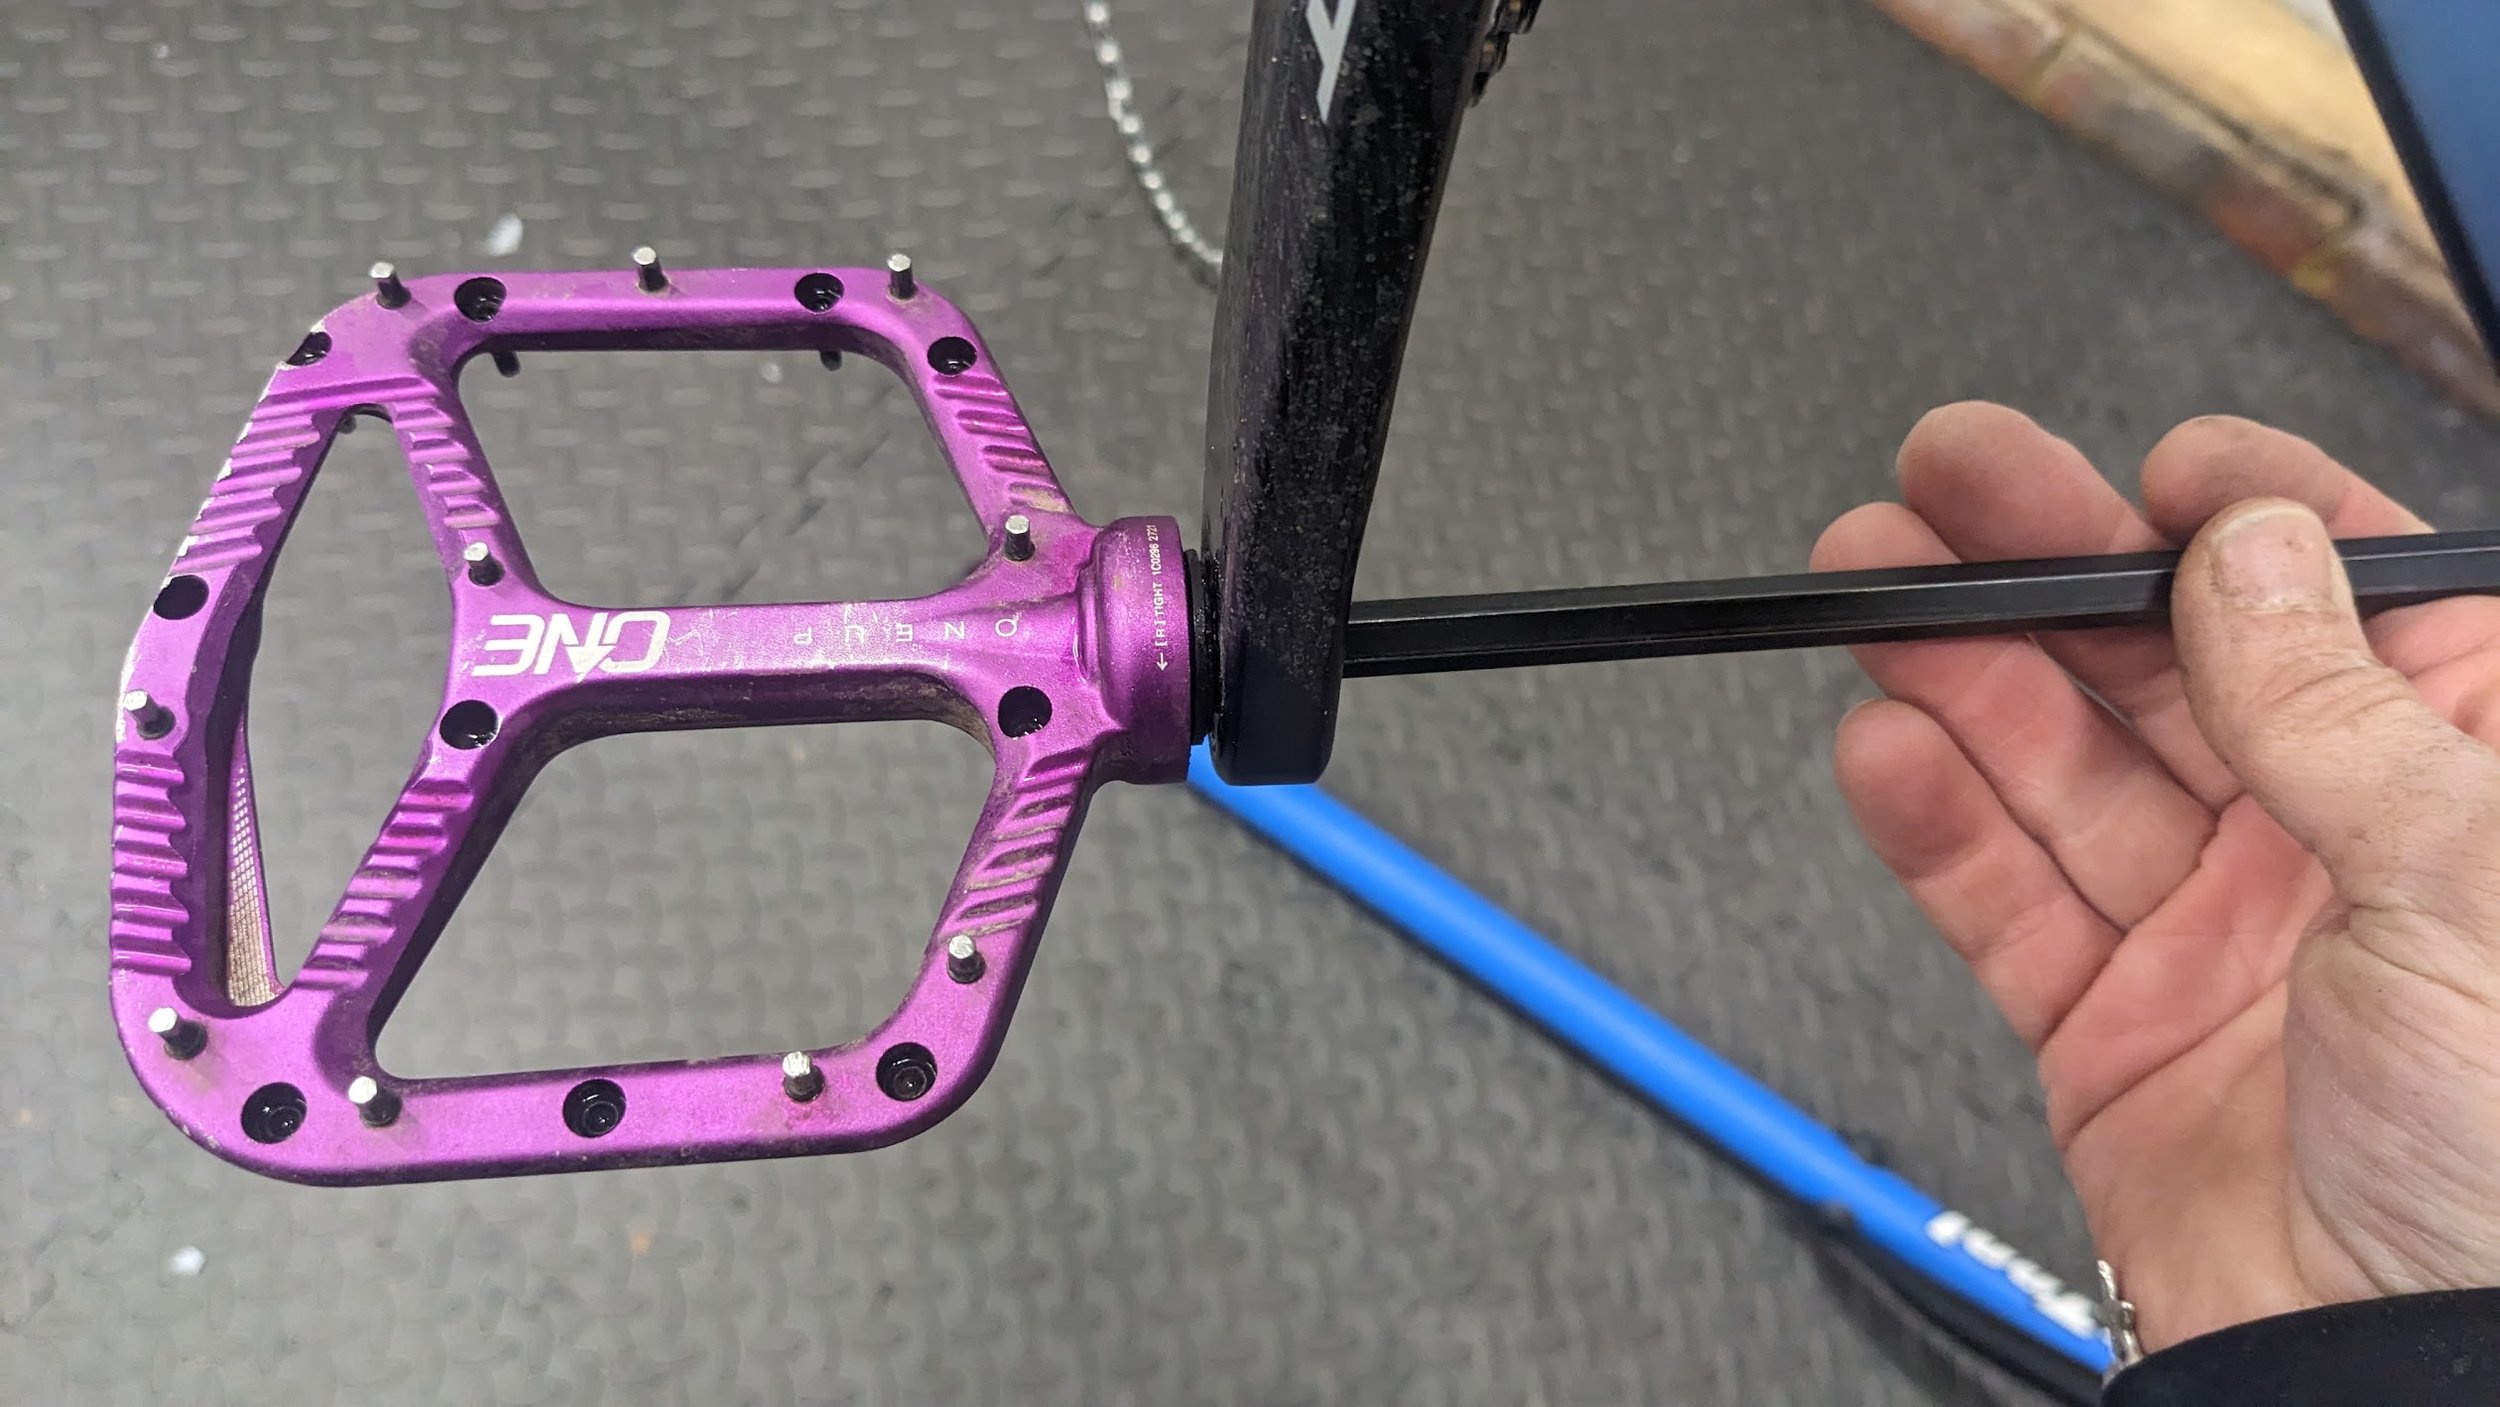
b. Remove pedals
c. Lower your dropper seatpost (or standard seatpost) to fit the bag
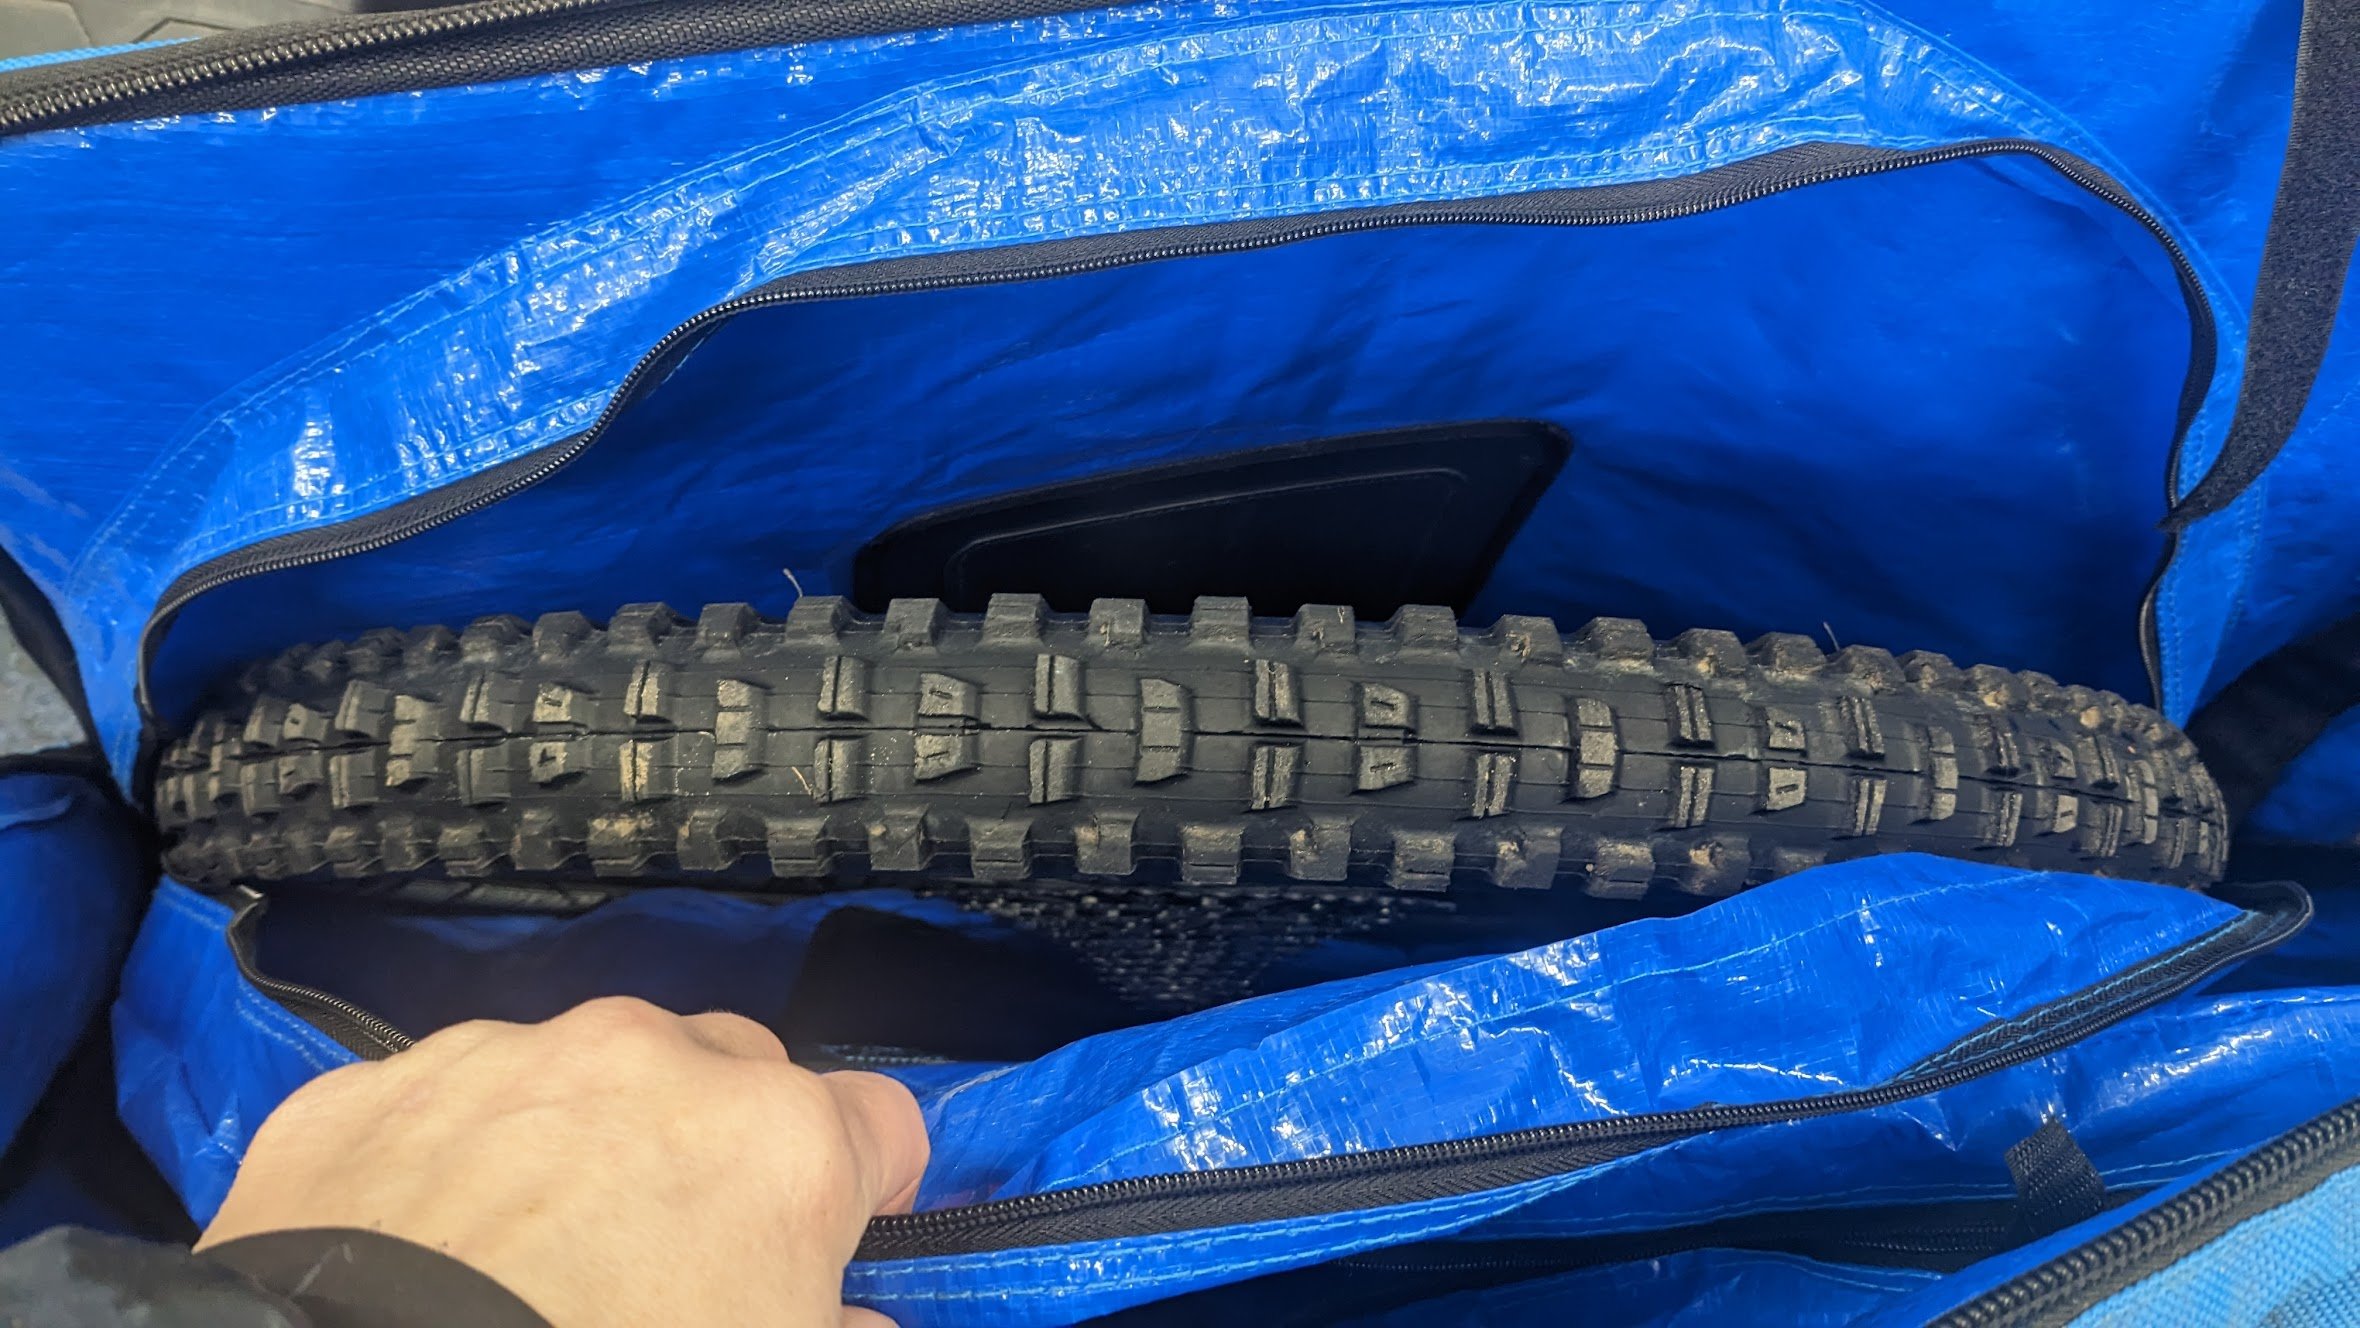
d. Remove your wheels and deflate so they fit in your bag
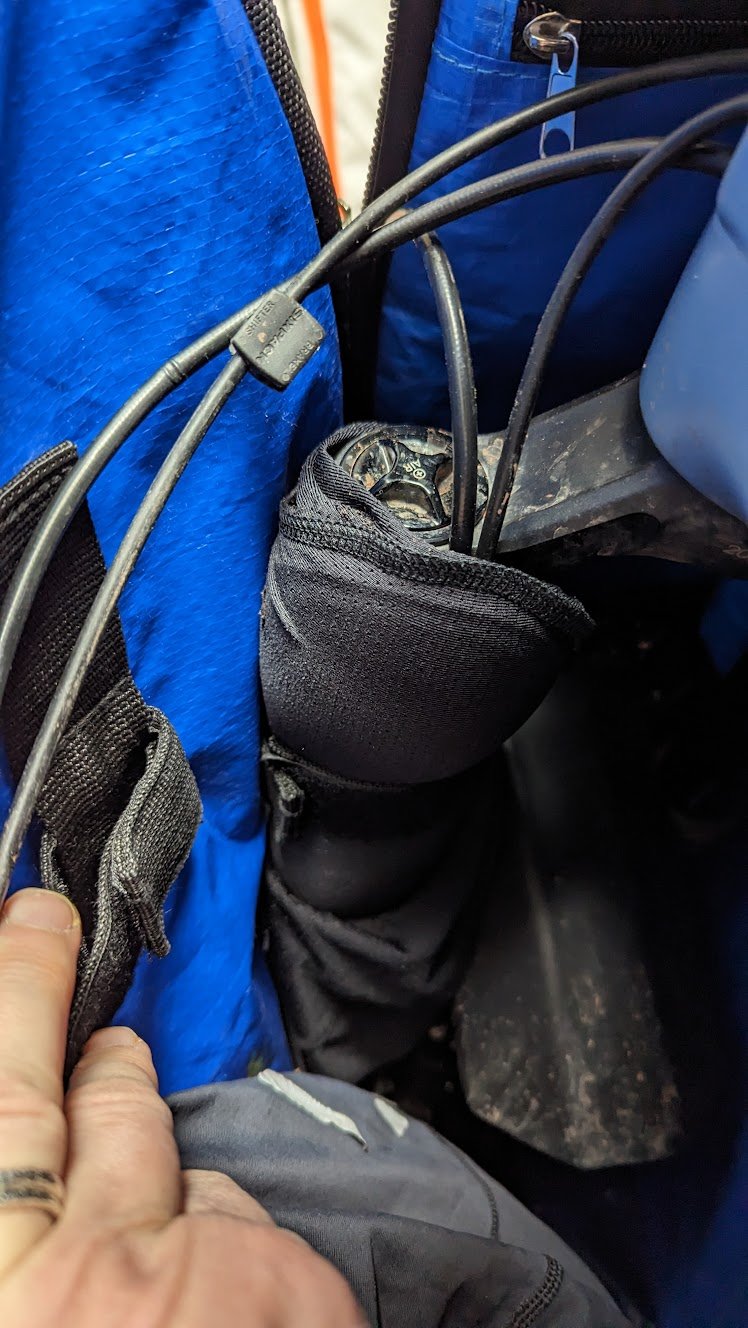
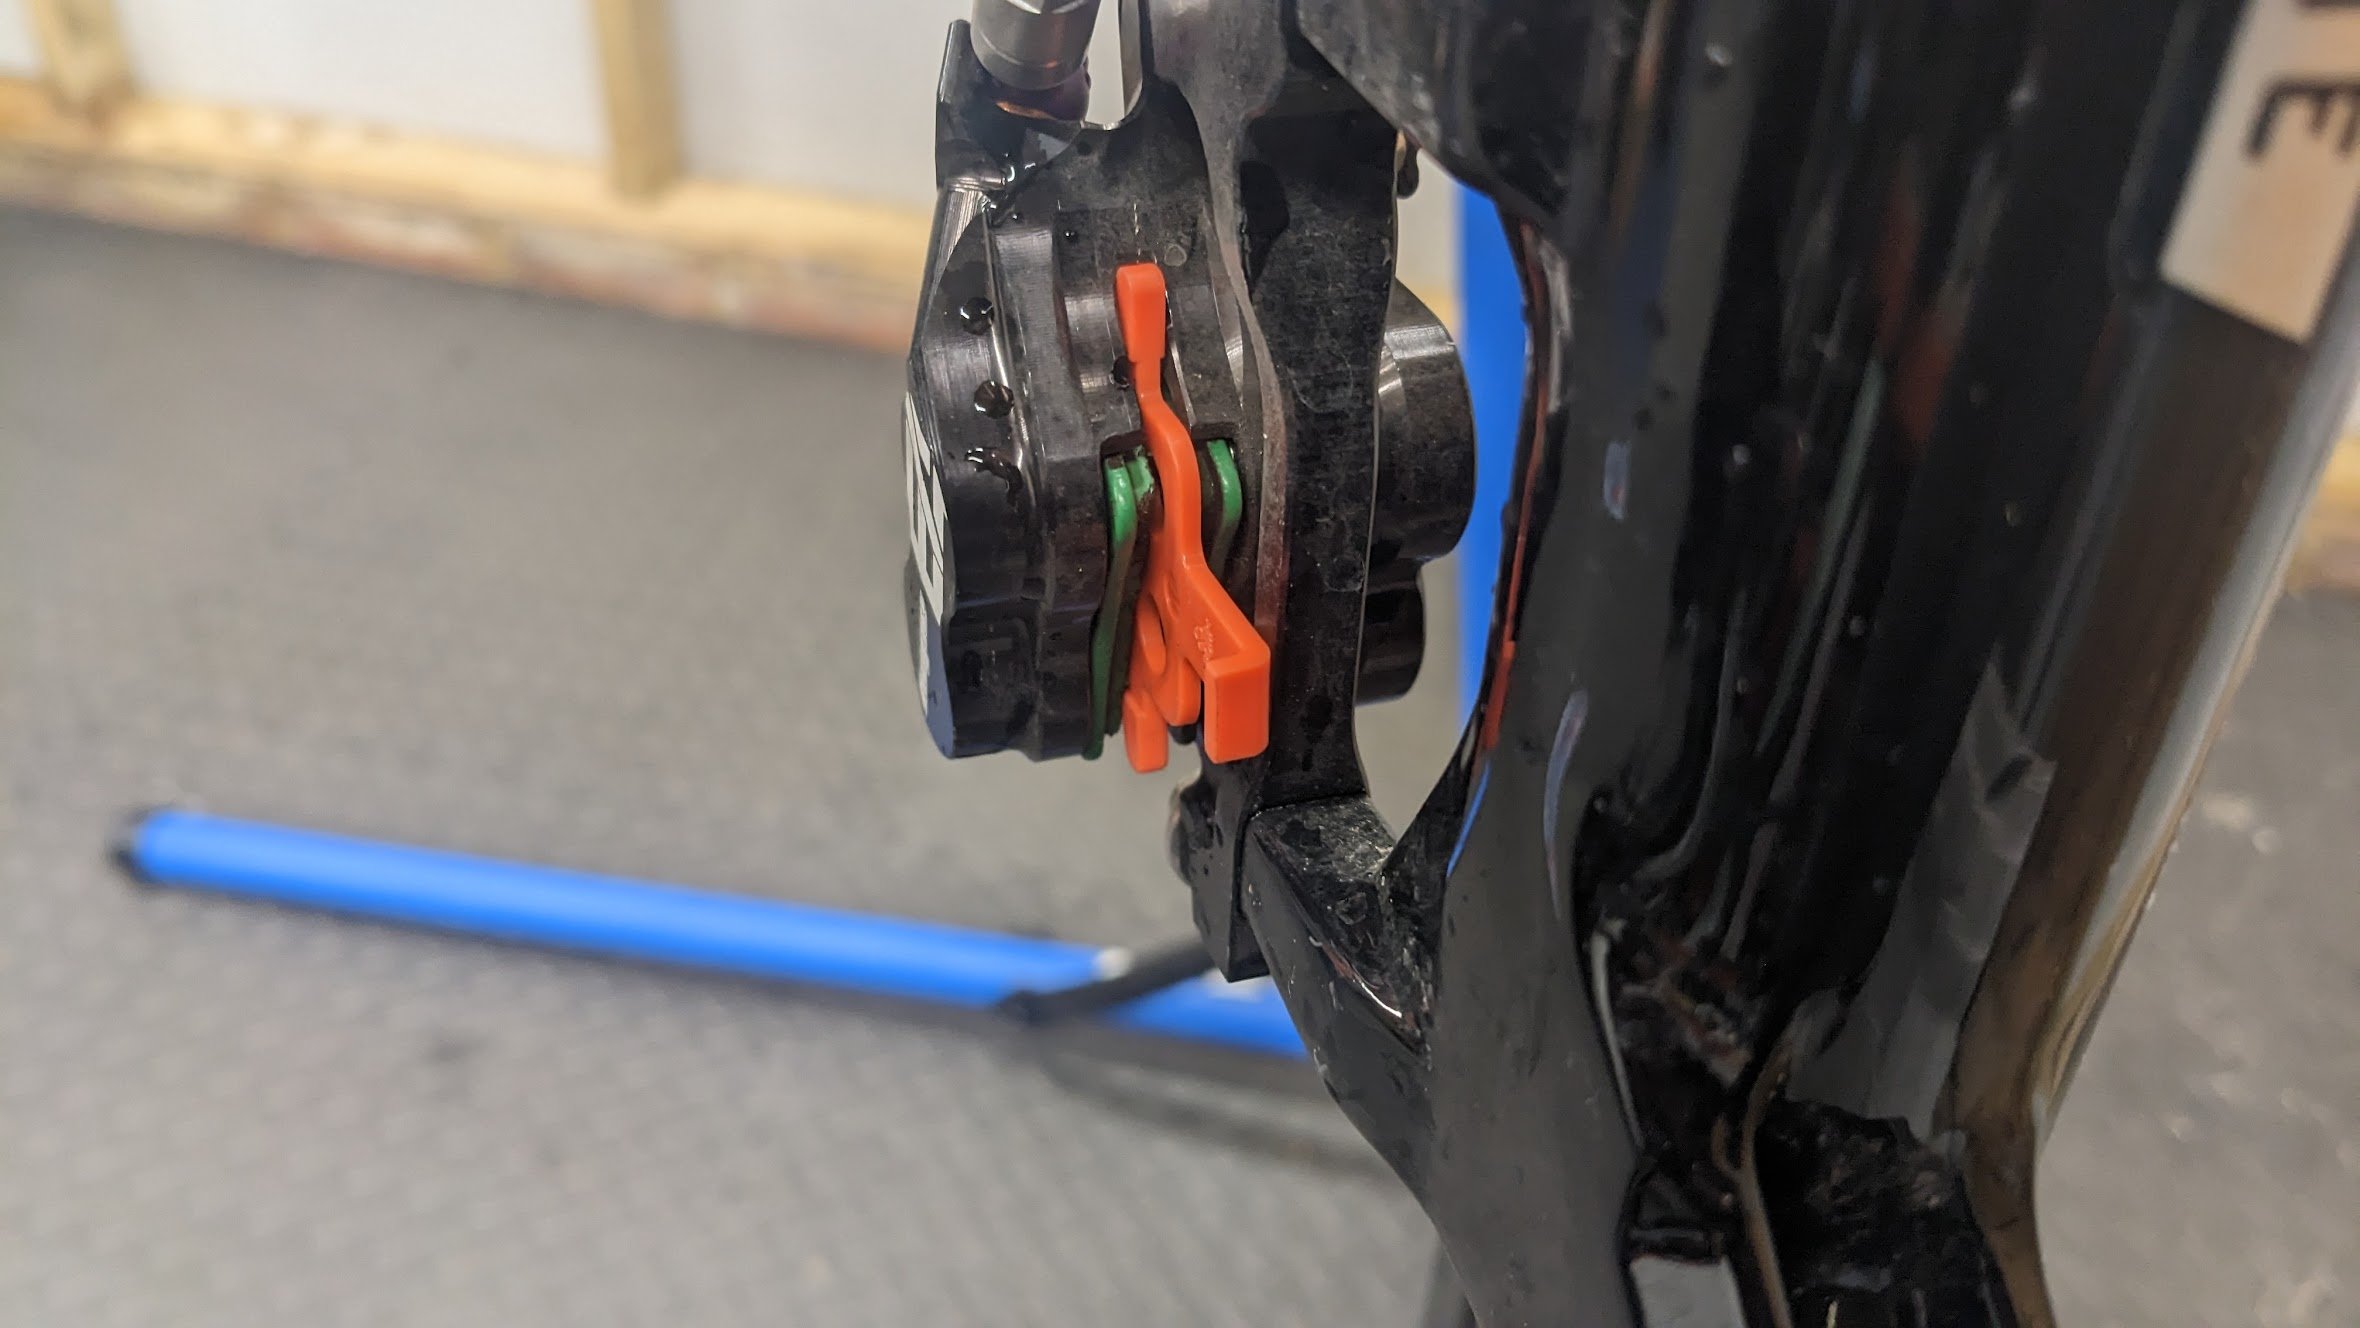
e. Place pad spacers (or bits of cardboard held with elastic bands) between hydraulic brake pads
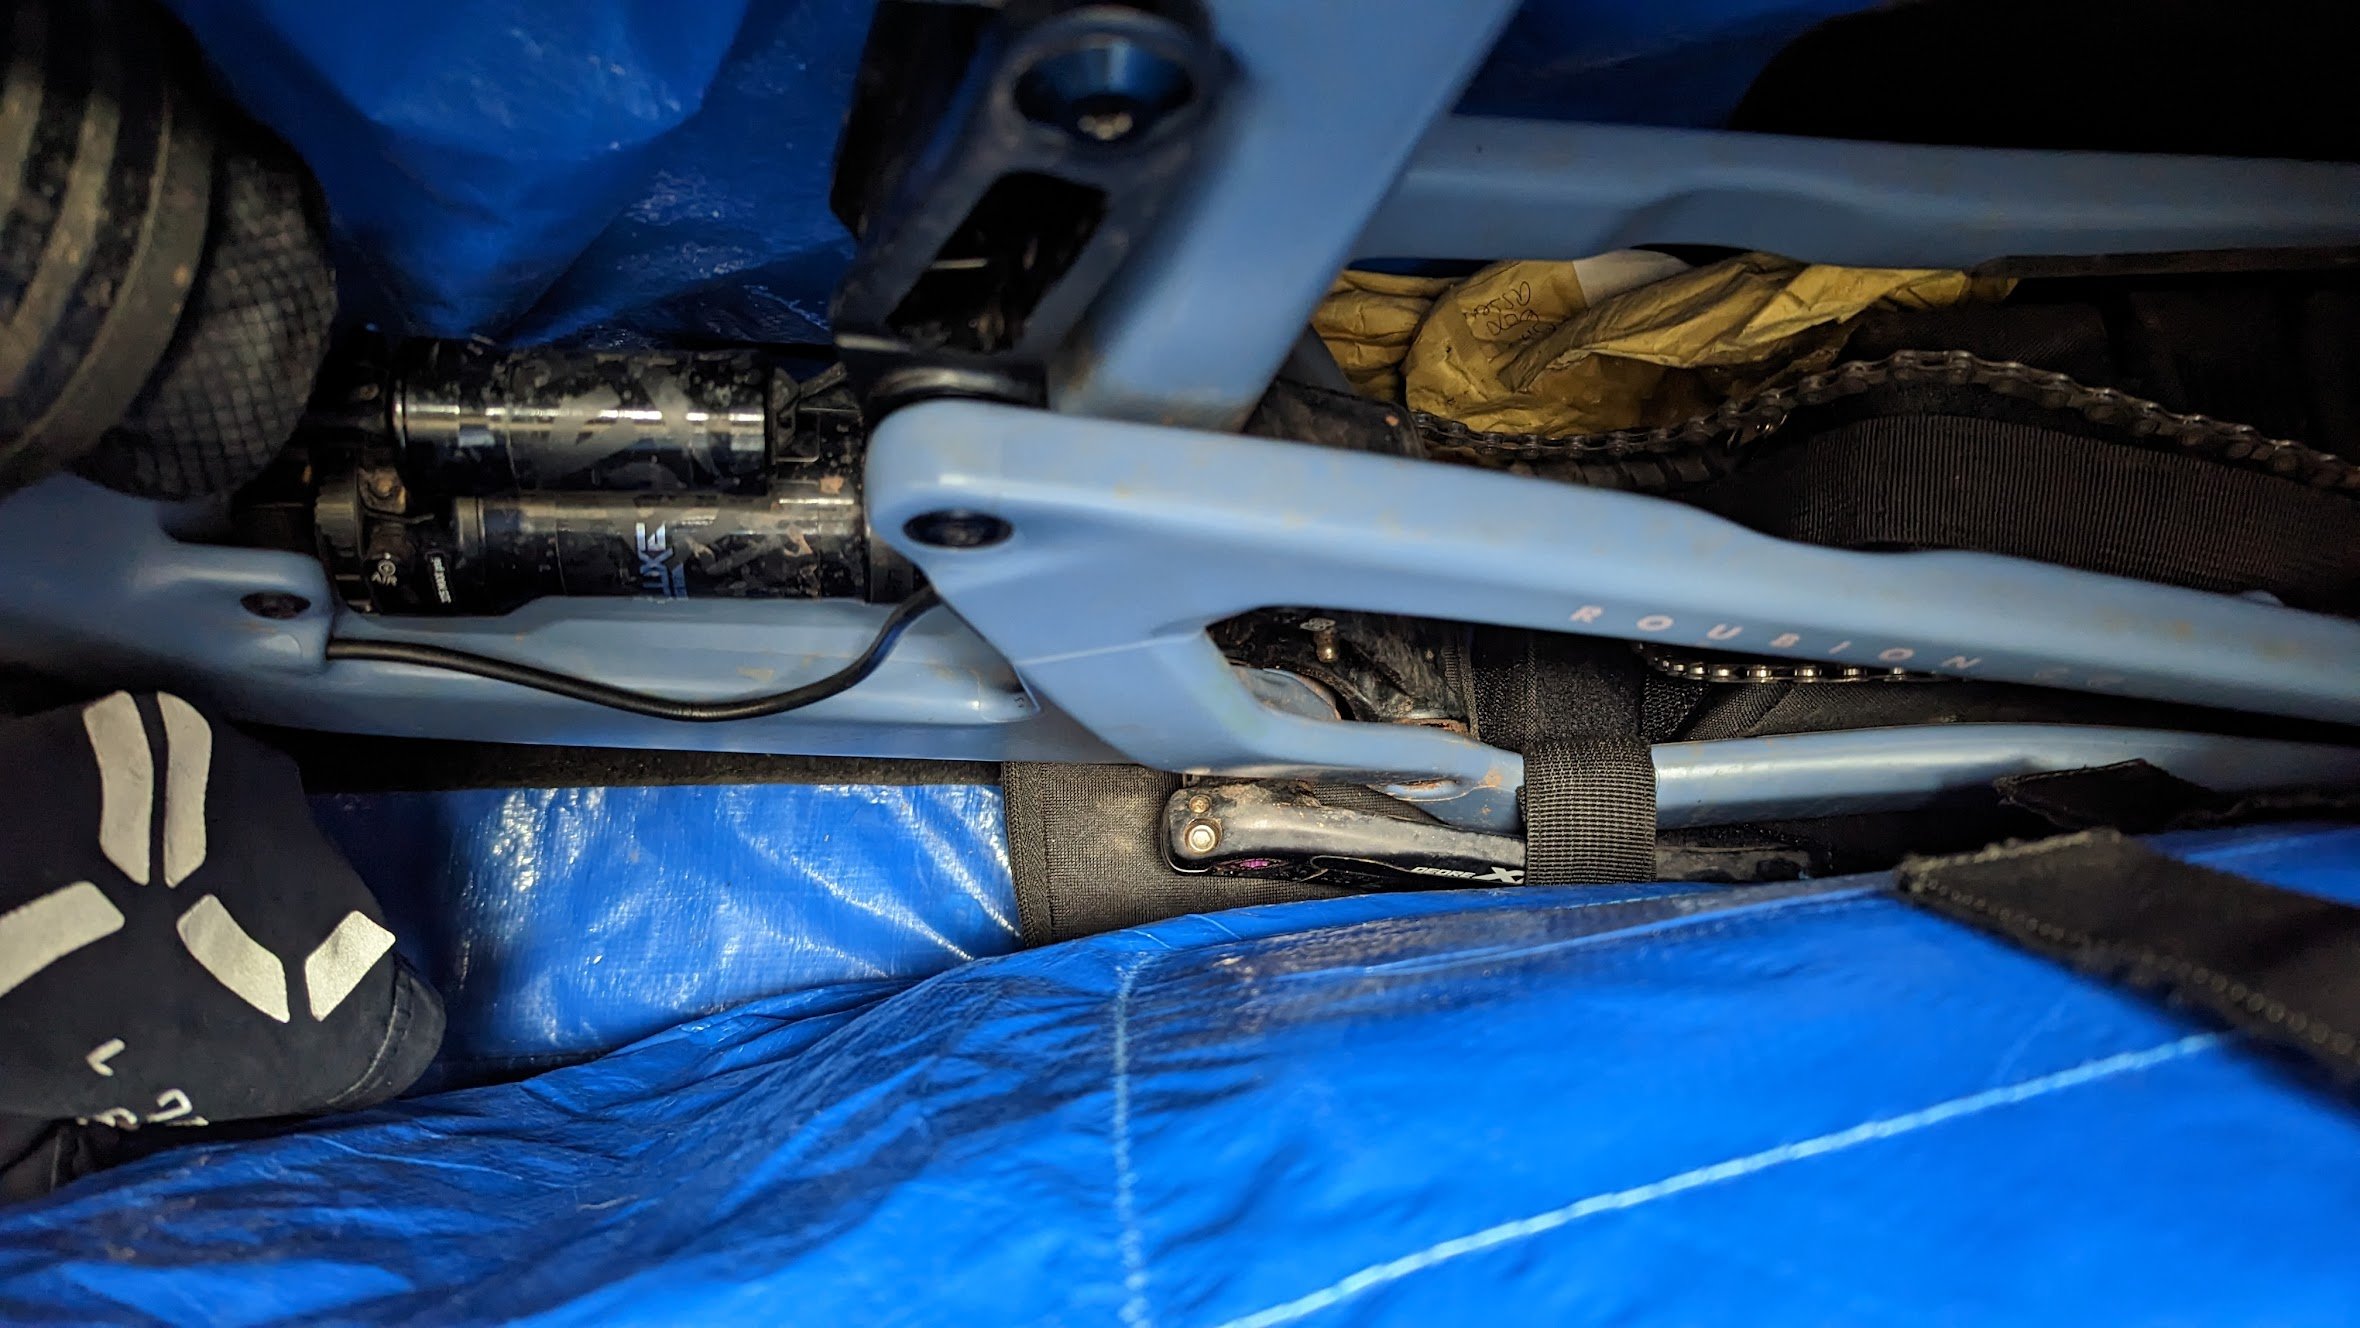
f. Remove the derailleur and hanger from the frame (you can leave them attached to each other). Tuck into a padded bag and secure to the frame
g. Remove pedals and secure one of the cranks to the rear chainstay
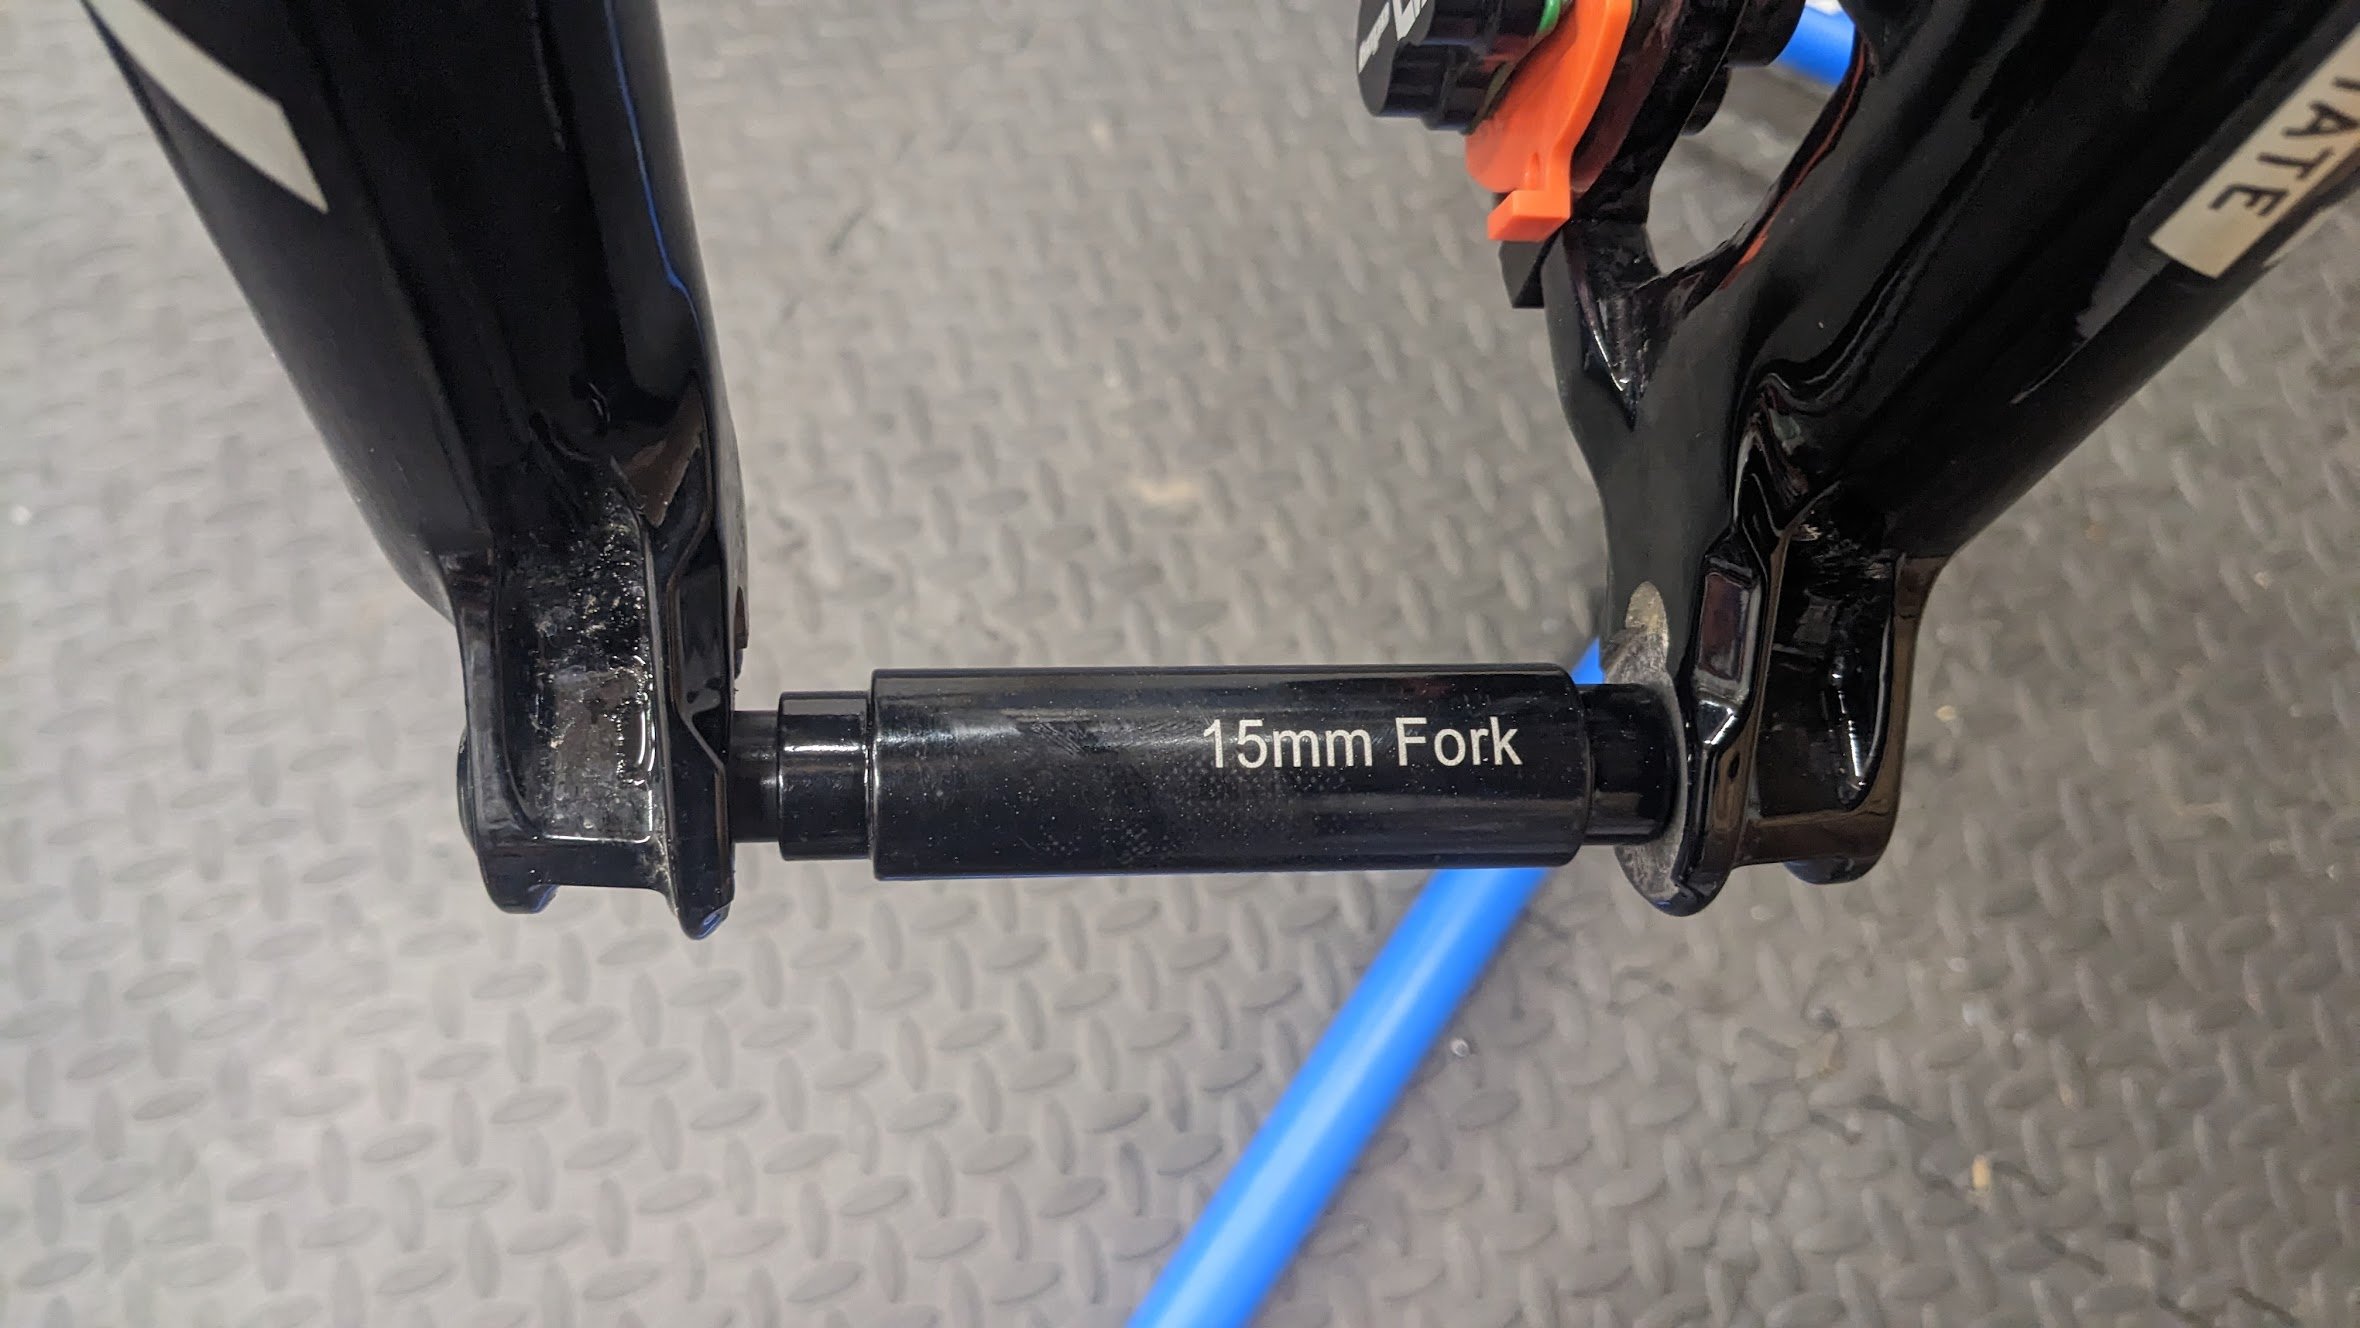
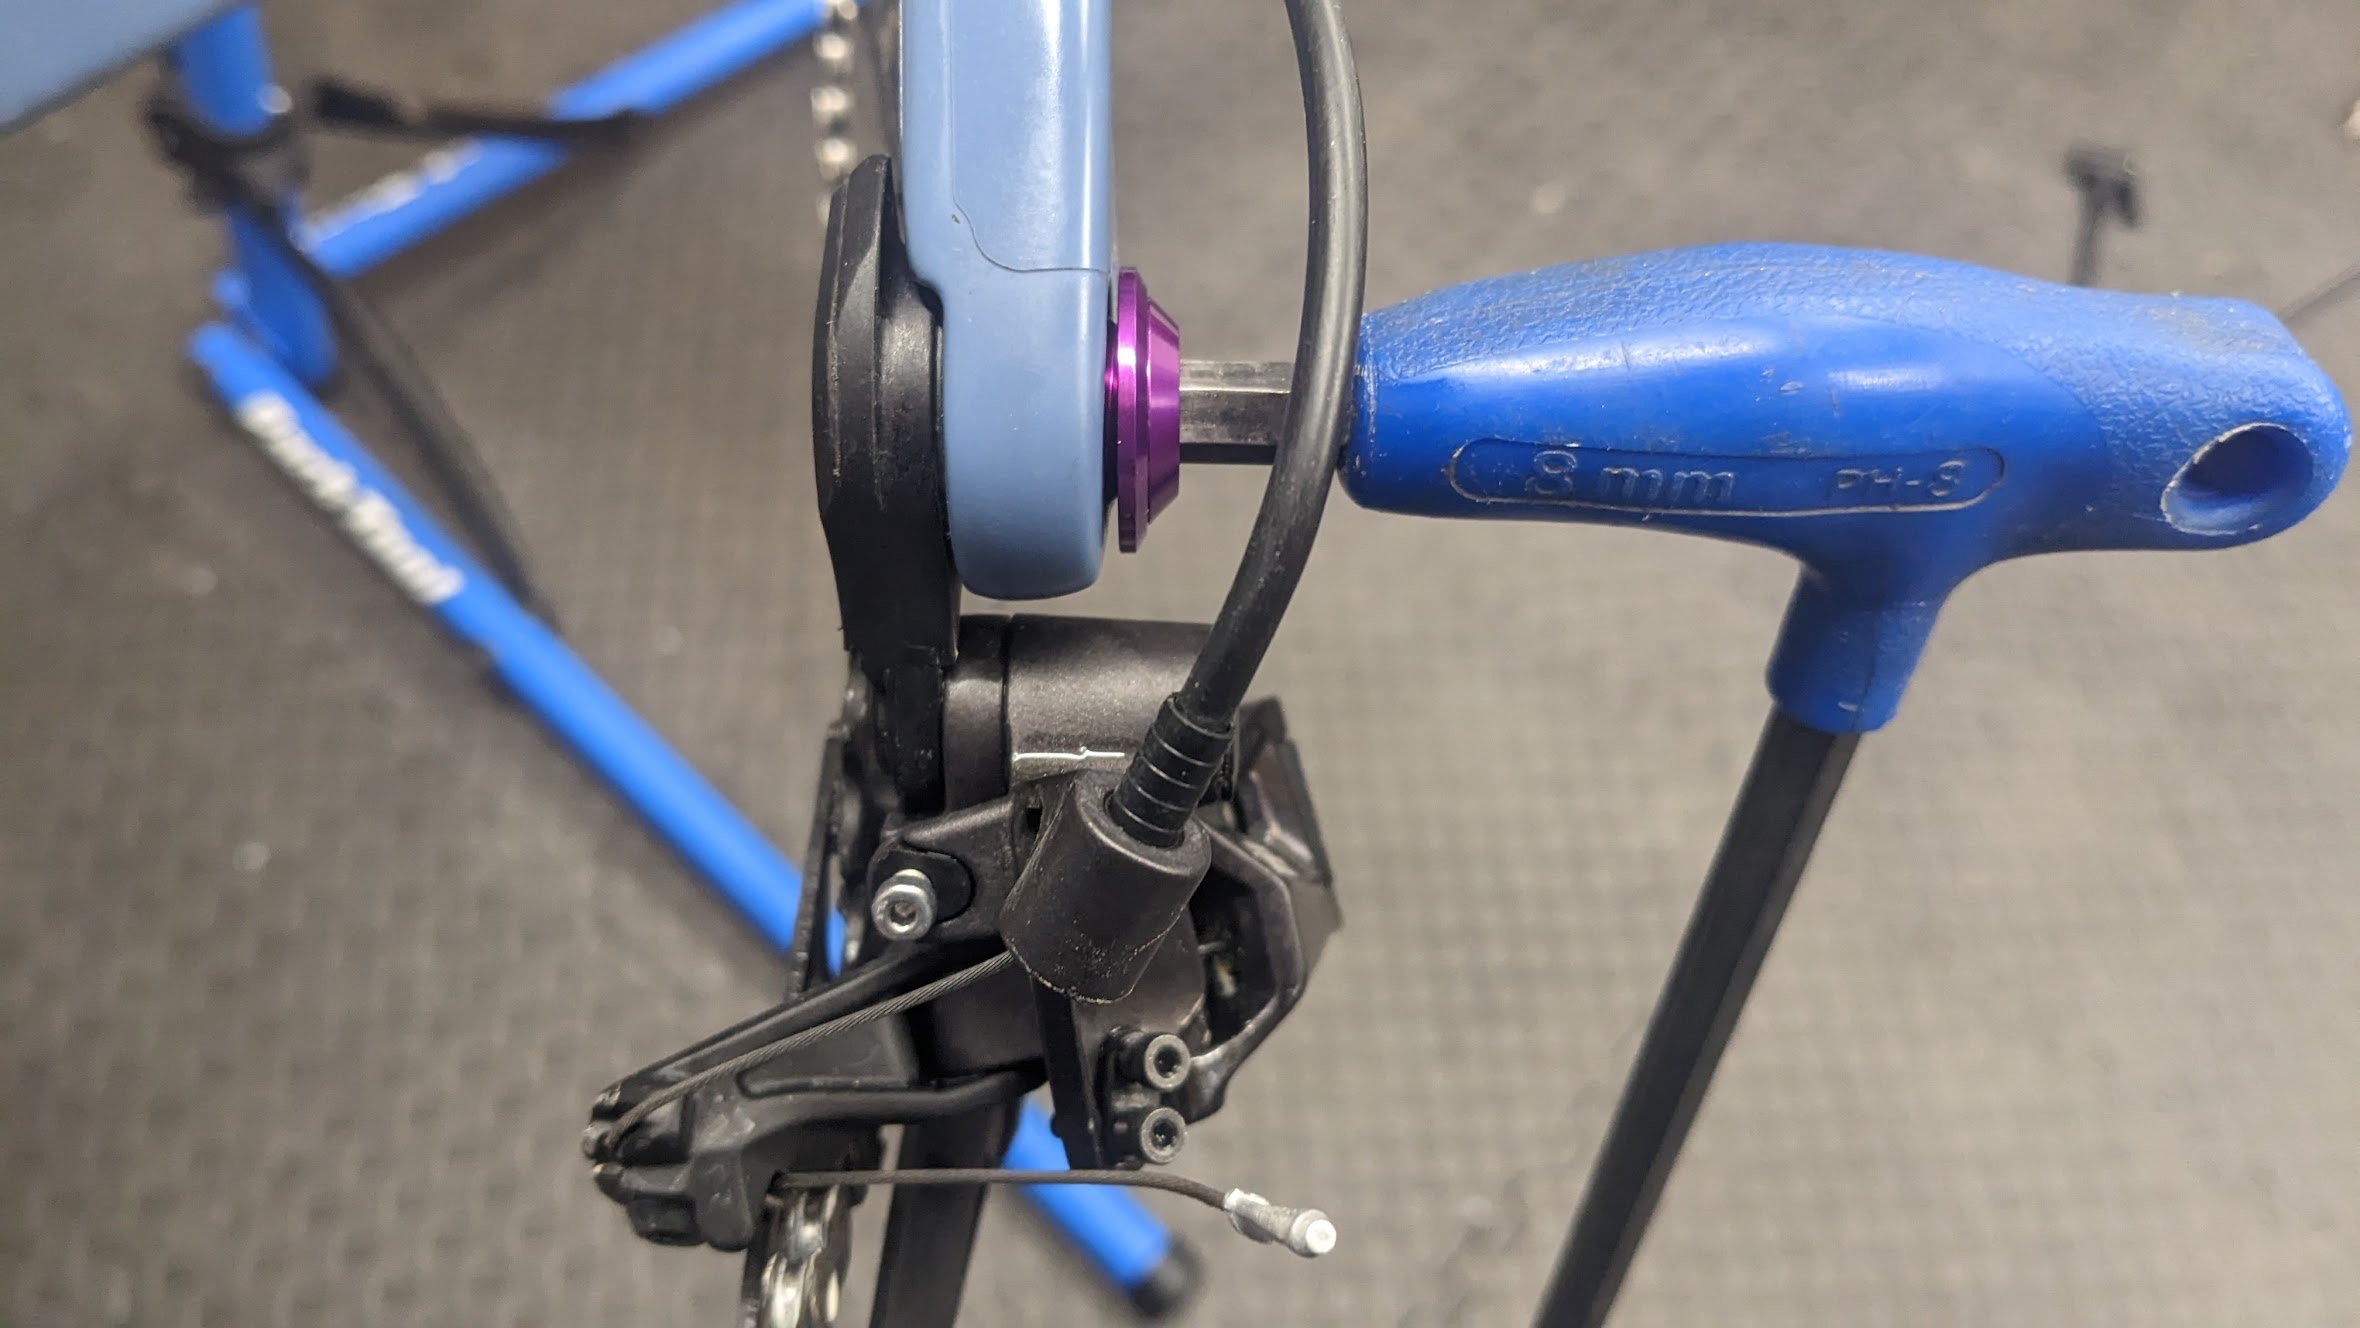
h. Pop your spare hanger on to the frame and put both front and rear axles into the fork and frame. If the bike bag has axle spacers thread these on before securing. This helps to stop any sideways force on the bag from squashing the fork and frame.
i. Secure your bike in the bag with any additional padding and support available. You can use padded chamois/liner shorts around the forks and bars if needed. The main areas to be aware of are:
i. the forks (especially stanchions if there’s a chance the bars could rub on them)
ii. support under the bottom bracket
iii. support under the rear triangle
iv. making sure the bars are securely in place.
4. Tools to take with you:
a. aside from the usual trailside repair tools, make sure you’ve got specific tools for jobs like replacing pedals (mine require an 8mm hex key which isn’t standard on my multitool
b. I have a favourite disc rotor setting tool by Birzman so I popped that in as well. Without a stand this thin metal clip makes it easy to centralise the rotor with an even gap either side
c. Grease, carbon grip paste and chain lube. Pop a small amount of your favourites in the bag so you can keep the bike running smoothly while away.
I hope these tips help you and you have great adventures with your bike! Drop me a line and let me know how you get on - I’d love to hear from you :-)
Seven Pools, Soldiers Pass Trail, Sedona